
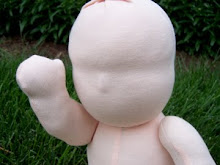
When finishing your baby, you can start with either the face or the hair. I will be working on the face first to better illustrate the process.
Many dollmakers personalize their doll through their face. Here is your chance to get complicated or as simple as you like. Art stores carry a large supply of fabric paint and markers you can use to apply your face, or you can go the traditional route and embroider the face, butbe forewarned: The nature of the cotton skin fabric is such that it is not forgiving of embroidery mistakes, be careful – you may want to practice embroidering on a piece of scrap fabric before trying it on your doll. Do not rework these stitches on your doll more than once – it will show and cause a mess. I often trace the outlines of my eyes with a fabric pen to ensure my stitches are even. Find what works for you.
I will be explaining the traditional method of embroidering the face.
Supplies:
 Pearl-headed pins


 utilize is to start small and then build outwards with my stitches until my eye is a good size. Don't worry about getting your stitches too even - a little imperfection adds character.


Cotton floss in eye color
Pearl-headed pinsDoll maker's needle
Scissors
Step 1: Mark your doll's face with pins
With large headed pins, mark the eyes and mouth of your doll. Move them around until you are happy with the placement.
Step 2: Choose your eye color
DMC or any other high-quality cotton floss works well. Make sure your choices will work well with your hair color. My baby is going to have brown eyes - I'm using DMC color 801.
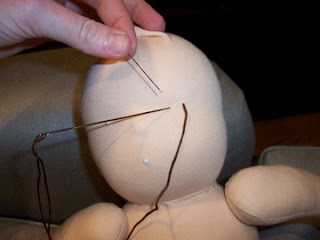
Step 3: Secure your floss to the back of the head
Thread your dollmaker’s needle with six strands of embroidery floss. Attach the floss to the back and side of the skull by stitching in place once or twice.
Step 4: Start the eye
Bring the needle through the skull to the front of the face - this gets a little sadistic. Your marker is going to represent the center of your eye - you will be stitching an equidistant distance around your eye. Remove your pin to get it out of the way.
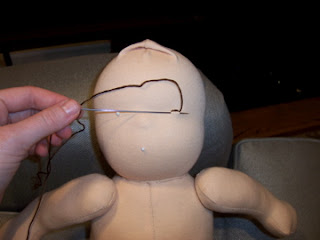
Step 5: Fill in the eye
Fill in the eye with straight stitches that float across the surface of the skin. Do not pull too tight as to distort the fabric, but tight enough so little fingers can’t get under the thread. Let me repeat! The cotton skin fabric is not forgiving of embroidery mistakes, be careful – you may want to practice embroidering on a piece of scrap fabric before trying it on your doll. Do not rework these stitches on your doll more than once – it will show and cause a mess. I often trace the outlines of my eyes with a fabric pen to ensure my stitches are even. Another tip I often
utilize is to start small and then build outwards with my stitches until my eye is a good size. Don't worry about getting your stitches too even - a little imperfection adds character.I've been keeping my eyes small - there are only about 4-5 passes with the floss over about 8 rows of the knit fabric.
Step 6: Secure floss for second eye
Once you are satisfied with your first eye, take the thread out through the opposite side back of the head and stitch in place once or twice. You will now repeat steps 4-5 for the second eye.
Step 7: Secure floss and cut
Once your second eye is finished, bring the floss back out where you started the second eye, stitch in place and cut.